How to Remove Words From Your Mac Dictionary
When you work on a Mac, the device’s built-in spellchecker becomes an invaluable tool for correcting typos and hunting down mistakes.
However, if you regularly type words that aren’t in your Mac’s dictionary, the spellchecking function can actually make your life rather more difficult.
For instance, if you regularly enter unusual names, brands, or foreign words, your Mac might interrupt your writing process by autocorrecting these ‘mistakes’. What’s more, if you click on an underlined or misspelt word, there’s a chance you’ll accidentally click on the ‘add to dictionary’ option.
This can become rather irritating when trying to write quickly and productively; sometimes it can feel as though you’re fighting against your Mac’s spellchecker.
In this article, we’re going to tell you how to easily add, remove, and correct words in the macOS dictionary.
How to add a word to the macOS dictionary
To add a new word into your macOS dictionary, you’ll need to use the TextEdit application (there are other apps available, but this will be the easiest to get your hands on).
Just follow these simple steps:
- Open a Finder window, go to the Applications folder, and open the TextEdit application.
- Type the word you wish to add to the dictionary but ensure you don’t press the spacebar (this will enable the autocorrect function).
- Press and hold the Control key on your keyboard, click the word you want to add, then select ‘Learn spelling’ from the context menu.
Your chosen word should now have been added to your Mac’s dictionary. From this point forwards, it’ll be a recognised word, and you can repeat this process for any other words you want to add.
Easy, right?
How to remove a word from macOS dictionary
If you’ve accidentally added a misspelt word into your macOS dictionary by clicking “add to dictionary” (see below), you’ll be glad to hear you can remove it whenever you wish (or amend it, if needs be – we’ll get to that in a moment).
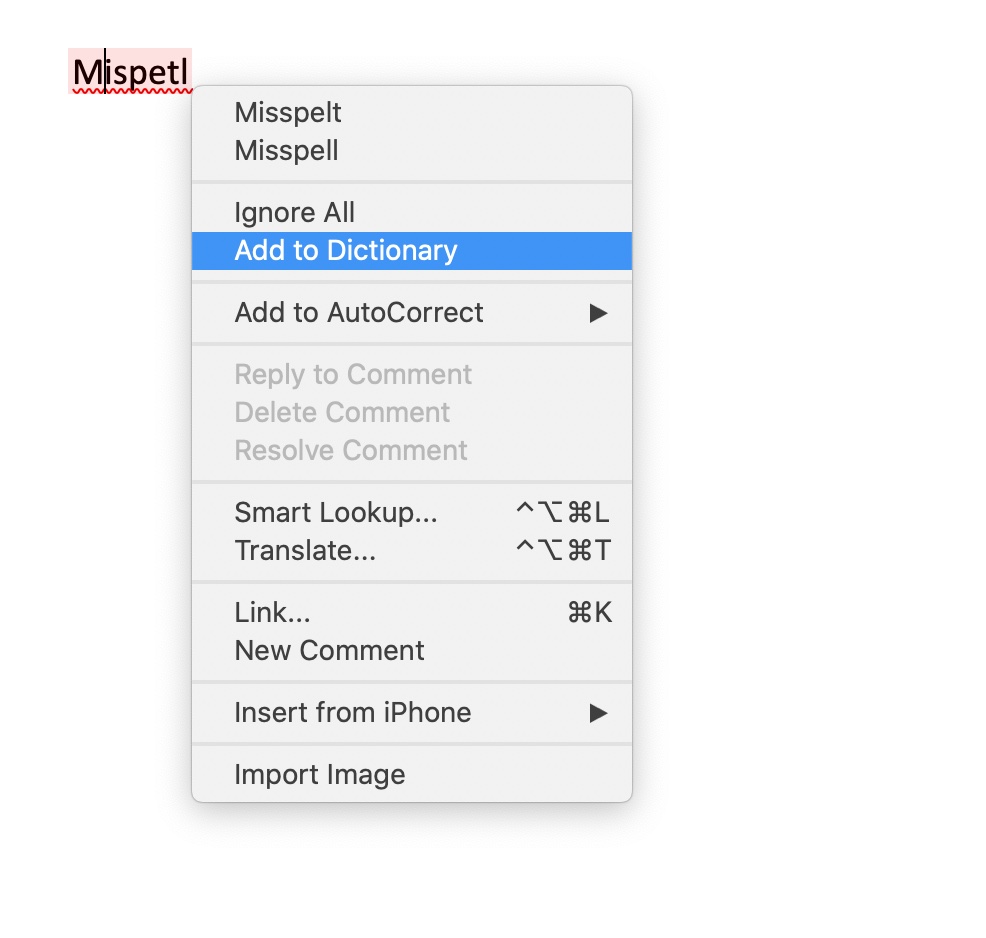
Just bear in mind that you can only do this for words you’ve added yourself, and not any words that are included in the dictionary by default.
To remove words in your macOS dictionary, follow these steps:
- Open another TextEdit document (see instructions above).
- Type the word you wish to remove from the dictionary (again, don’t press the spacebar).
- Press and hold the Control key on your keyboard, click the word and select the option ‘Unlearn Spelling’.
How to edit words in your macOS dictionary
The ‘Unlearn Spelling’ option is the easiest way to remove words in your dictionary. But it can be time consuming if there are lots of words you need to amend.
Similarly, what if you simply want to edit the words you’ve added to your macOS dictionary?
With the following method, you can view, add, edit, and remove all words in your macOS Dictionary.
- Launch a new Finder window.
- Select the ‘Go > Go to Folder’ option from the toolbar.
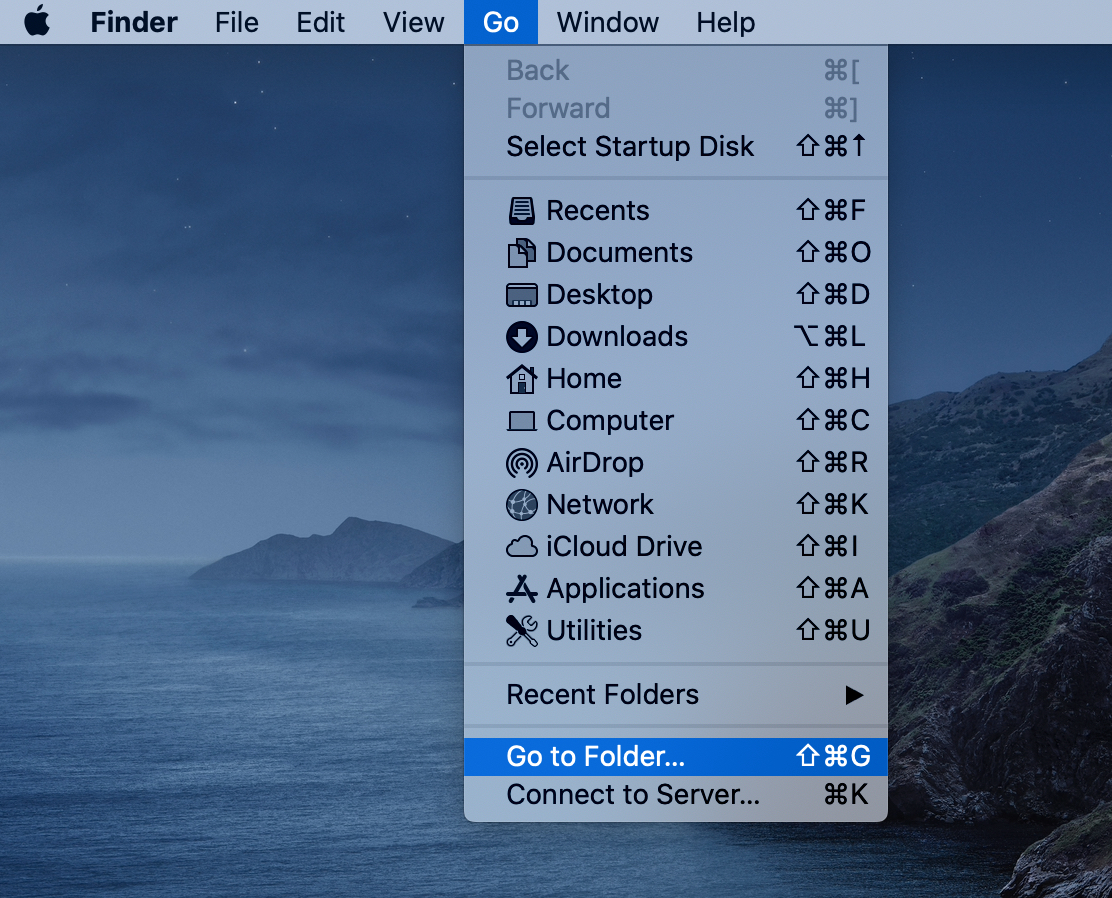
3. Enter the path ‘~/Library/Spelling’ and click ‘Go.’
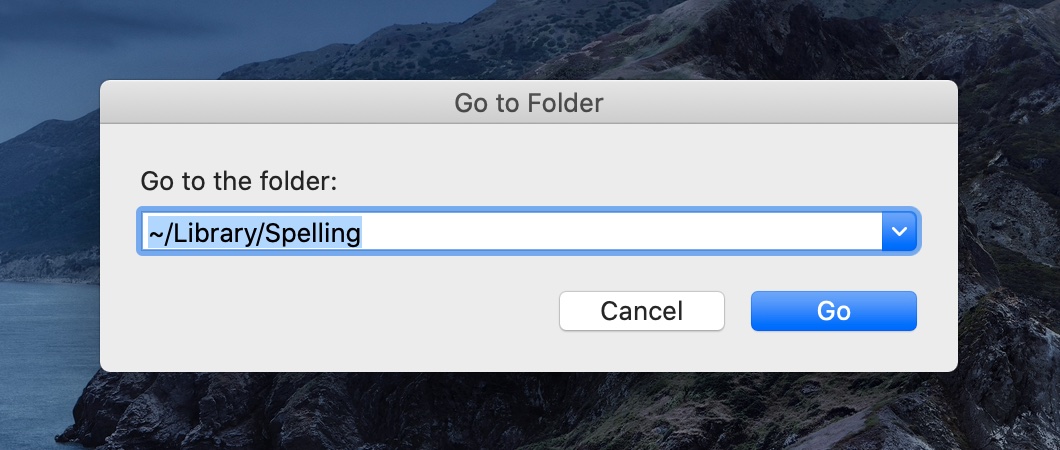
4. Press and hold the Control key on your keyboard and click the ‘LocationDictionary’ file and select ‘Open with > TextEdit.’
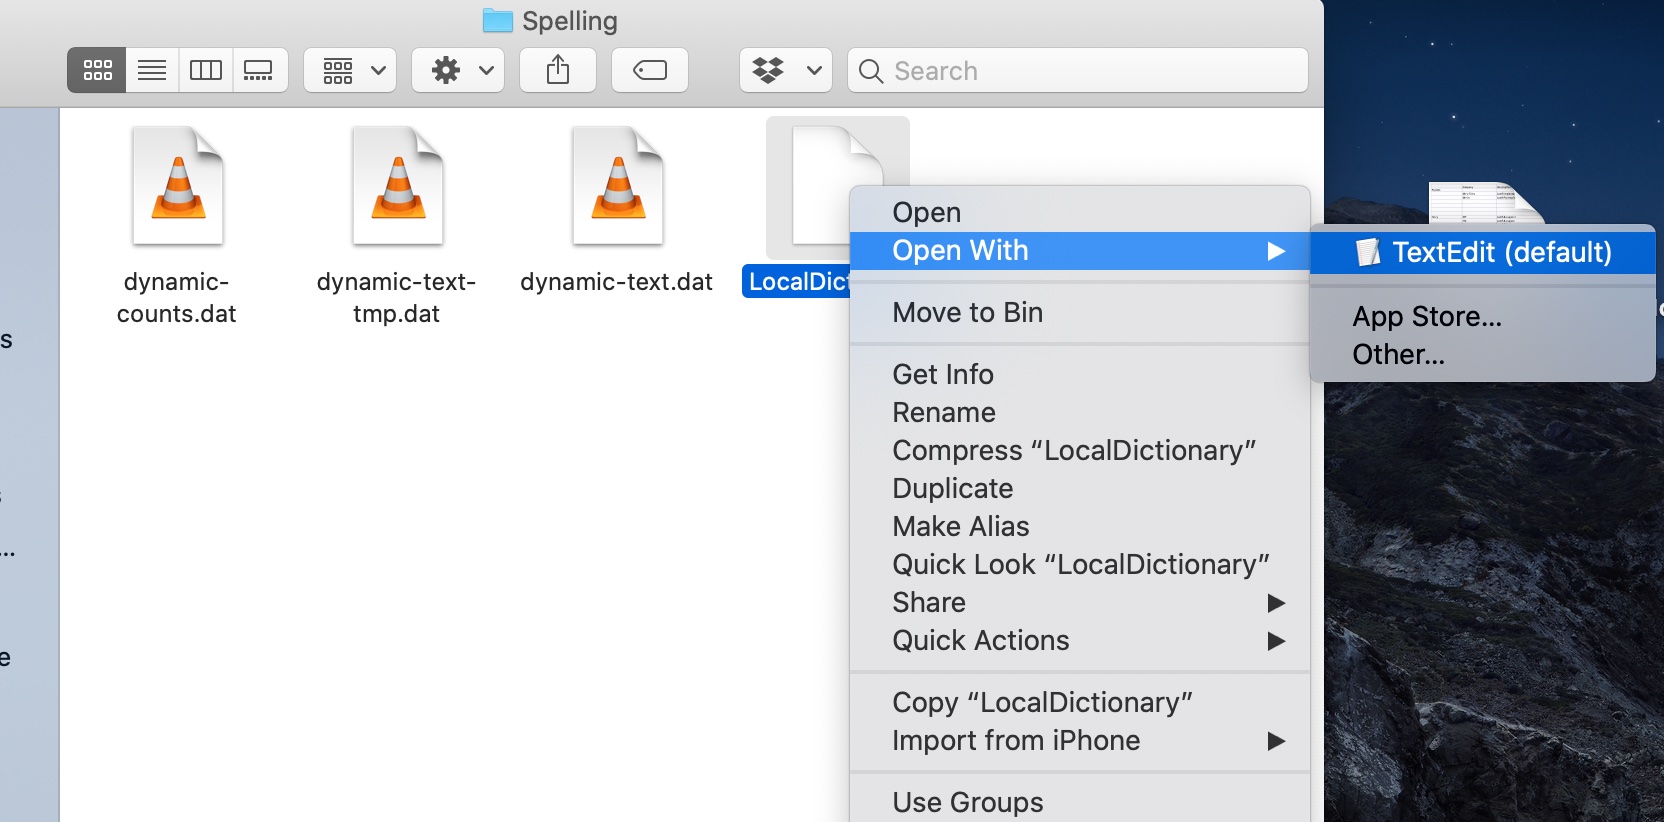
You should then have a LocalDictionary open in a new TextEdit document, in which you’ll see every individual word.
From here, you can edit these words just as you would with regular text, or you can delete the word itself to remove it from the dictionary. You can also add custom spellings by typing a word on a new line.
Once you’re happy with your amendments, you can save your changes to the dictionary by selecting ‘File > Save’ from the toolbar and closing the file.
We hope this has helped. Certainly, after correcting a few words and adding them to your dictionary, you should find writing with your Mac a much more enjoyable task!
If you need any assistance with the topics discussed today, or help in general with your Macs, just get in touch with the Moof IT team.


