Deploying Autodesk Maya 2018 with Jamf Pro
Hi all. I recently had the pleasure of deploying Autodesk Maya 2018 with Jamf Pro for a college in London. We were only there for the day and it was a bit of a late request, so I took it away as a task to work on. As a UK Jamf Support company providing Jamf consultancy services, it is worth us taking the time to get to the bottom of the process, as the skill can then be re-used for all of our customers.
There were a few things we needed to work out:
- How to get the software installed
- How to license and activate the software
- How to suppress the “Autodesk Privacy Statement” popup
- How to suppress the “Data collection and use” popup
- How to suppress the “What’s new highlight” popup
This article explains how to complete each of these tasks. Links to the scripts can be found at the bottom of the page.
How to get the software installed
The software is provided as a .app installer that can’t be deployed by Mac management systems like a normal package. Instead you can run a binary file located inside the .app bundle with a –noui option to have it run silently. The steps to install the software were:
- Create an installer package that deploys the “Install Maya 2018.app” into /tmp
- Add a post-install script with the following code:
#!/bin/sh
/tmp/Install\ Maya\ 2018.app/Contents/MacOS/setup --noui
License and activate the software
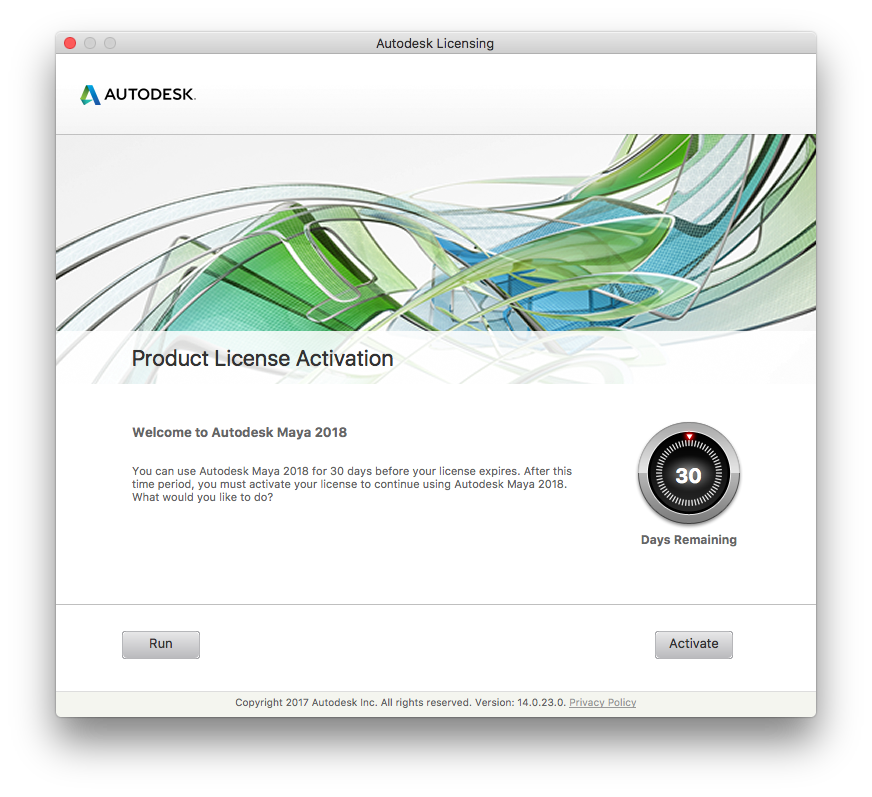
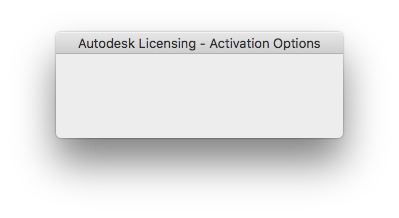
If you run the software after installing, you are presented with the following screen:

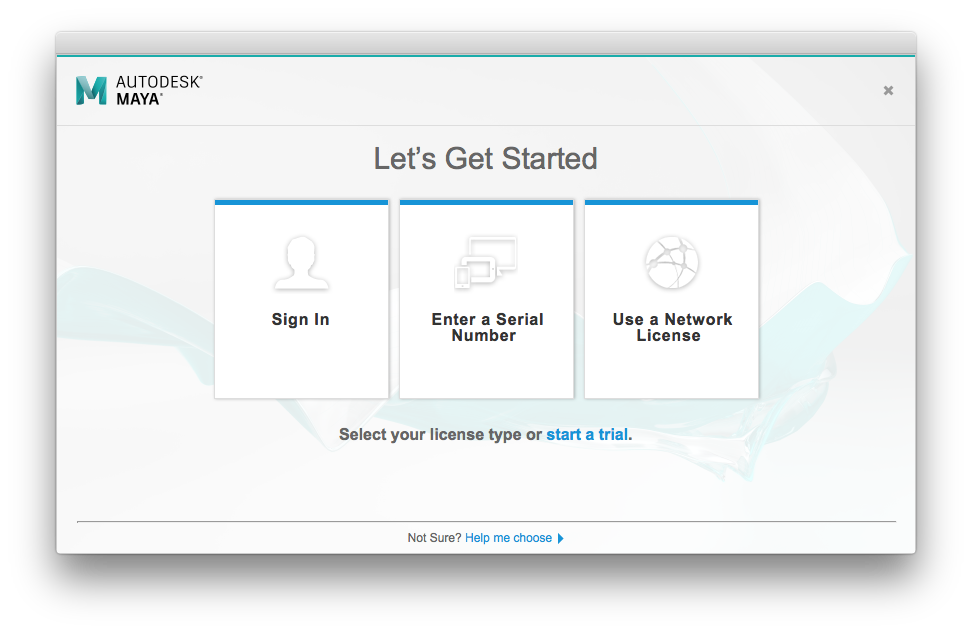
In this particular case, the college had a standalone license key, rather than a license server. To license and activate the software, there were two actions that we needed:
- Run the adlmreg binary located inside the Install Maya 2018.app bundle
- Create a license file in /Library/Application Support
Below is the code that we used:
#!/bin/sh

/private/tmp/Install\ Maya\ 2018.app/Contents/Resources/adlmreg -i S 657J1 657J1 2018.0.0.F XXX-XXXXXXXX /Library/Application\ Support/Autodesk/Adlm/PIT/2018/MayaConfig.pit

mkdir /Library/Application\ Support/Autodesk/CLM/LGS/657J1_2018.0.0.F
touch /Library/Application\ Support/Autodesk/CLM/LGS/657J1_2018.0.0.F/LGS.data
chmod 777 /Library/Application\ Support/Autodesk/CLM/LGS/657J1_2018.0.0.F/LGS.data
echo "_STANDALONE" >> /Library/Application\ Support/Autodesk/CLM/LGS/657J1_2018.0.0.F/LGS.data
Replacing XXX-XXXXXXXX with your actual license code.
This is documented in the Autodesk KB article here: https://knowledge.autodesk.com/support/maya/learn-explore/caas/sfdcarticles/sfdcarticles/command-line-installation-of-Maya-2017-on-Mac.html
While we had the opportunity, we tested a few other scenarios…
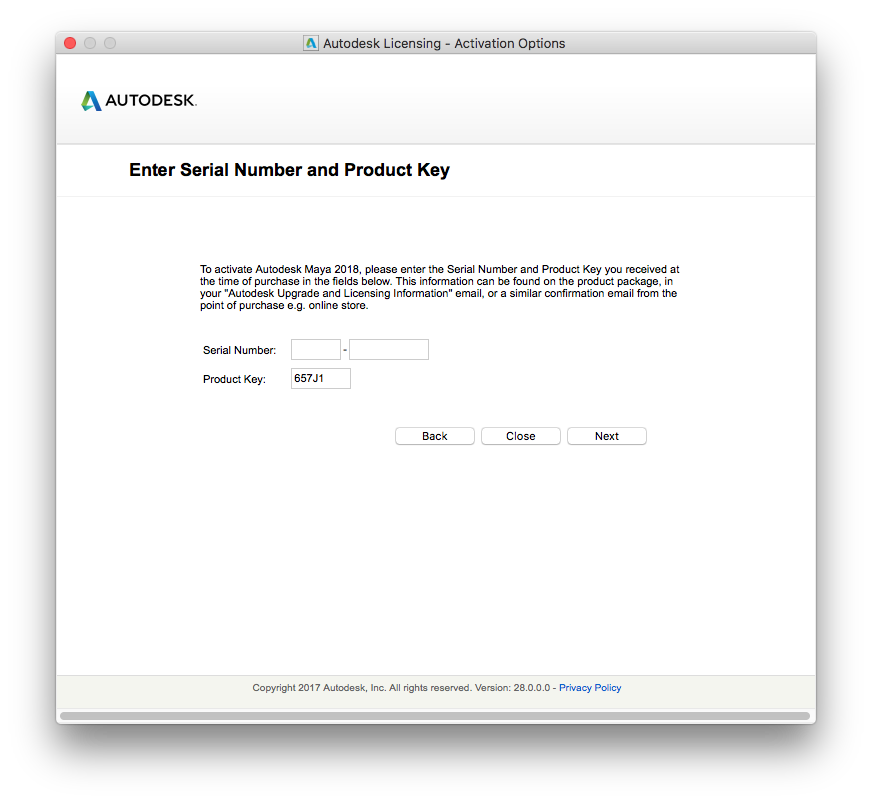
What if you run the adlmreg binary without the license file?
As you would expect, the standard licensing screen appeared:
What if you install Maya with the --serial_number, --product_key and --license_type options?
This didn’t appear to have any effect. The licensing screen appeared either way.
What if you create the licensing file, but don’t run adlmreg?
You still have to enter a license key on first run, but the screens are slightly different:
What about the “Serial Number doesn’t exist. Call setSerialNumber” messages?
You may notice that you get a Serial Number doesn't exist. Call setSerialNumber message when you run adlmreg. If you run the command a second time, the message changes to Serial Number exists. Skip registration.
The error didn’t have any impact on the licensing behaviour, and it made no difference if we ran it once or twice.
What should you see when it’s working?
After running the licensing and activation code, launching Autodesk Maya 2018 should display a small activation window for a few seconds:
Followed by the Maya loading splash screen:

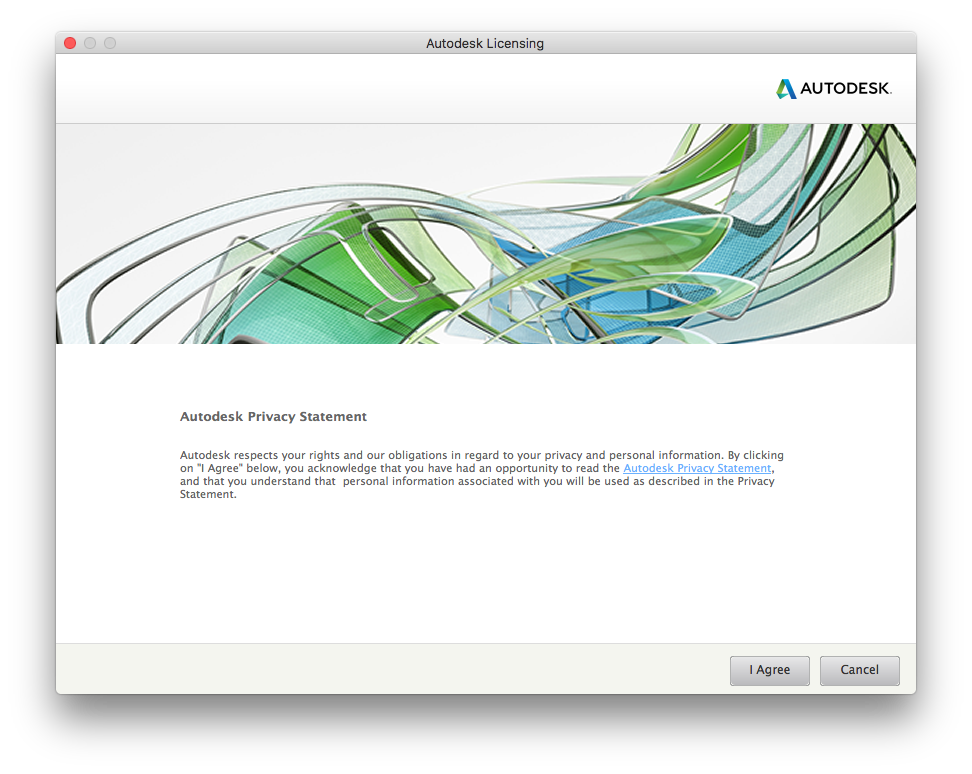
How to suppress the “Autodesk Privacy Statement” popup
You’ll notice over the next few sections of this article that Autodesk like to scatter config files all over the users home folder, in varying formats. I would like to think there is some logic to their approach, but I’m not aware what it is.
When the software first loads, for each user account, an “Autodesk Privacy Statement” popup is displayed:
This is controlled by an XML file stored in ~/Adlm/AdlmUserSettings.xml. The XML code is:
<?xml version="1.0" encoding="UTF-8" standalone="yes" ?>
<AdlmSettings>
<Section Name="PrivacyPolicyConsent">
<Data Key="2018.0.0.F">1</Data>
</Section>
</AdlmSettings>
Having a Section name of PrivacyPolicyConsent, a data key of 2018.0.0.F and a value of 1, will stop this first run message.
To programatically insert this into a users home folder at login, you can use the following code:
#!/bin/sh
mkdir /Users/$USER/Adlm
cat << 'EOF' > "/Users/test/Adlm/AdlmUserSettings.xml"
<?xml version="1.0" encoding="UTF-8" standalone="yes" ?>
<AdlmSettings>
<Section Name="PrivacyPolicyConsent">
<Data Key="2018.0.0.F">1</Data>
</Section>
</AdlmSettings>
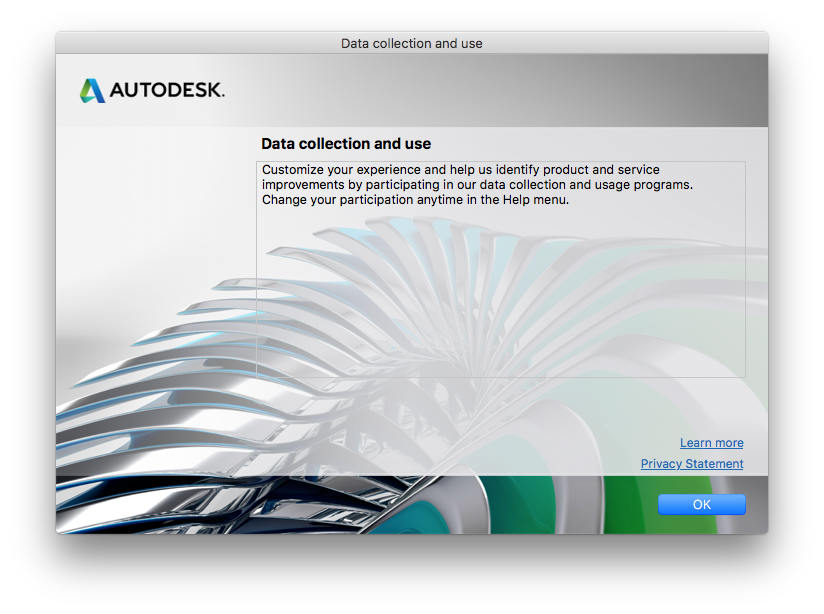
EOFHow to suppress the “Data collection and use” popup
The next screen that appears per user is a “Data collection and use” message:
There are two keys controlling this in this file: ~/Library/Preferences/com.autodesk.MC3Framework,plist:
ADAOptInADARePrompted
A Configuration Profile may also be used to control this setting, but given I’m having to run a script at login anyway, I used the defaults command:
defaults write /Users/$USER/Library/Preferences/com.autodesk.MC3Framework ADAOptIn -int 1
defaults write /Users/$USER/Library/Preferences/com.autodesk.MC3Framework ADARePrompted -int 1
defaults write /Users/$USER/Library/Preferences/com.autodesk.MC3Framework OverridedByHKLM -int 0
A couple of other points:
- You have to set the
OverridedByHKLMkey as well, otherwise it didn’t work - You have specify an integer type
-intfor the keys as defaults will use a string type if you don’t. I tried this out, and the app crashes on startup.
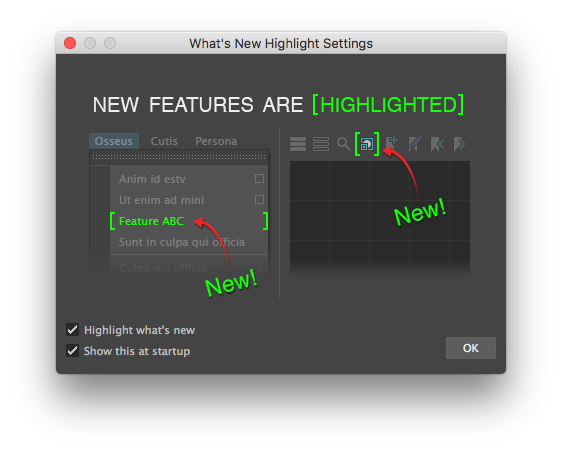
How to suppress the “What’s new highlight” popup
The last popup message is a “What’s new highlight” screen:
This is controlled by a Autodesk config file here: ~/Library/Preferences/Autodesk/maya/2018/prefs/userPrefs.mel. The two important values are:
-iv "displayNewFeatureHighlights" 0 (line 408)
-iv "showHighlightNewFeaturesWindowOnStartup" 0 (line 1294)
Setting displayNewFeatureHighlights to 0 changes the message to:
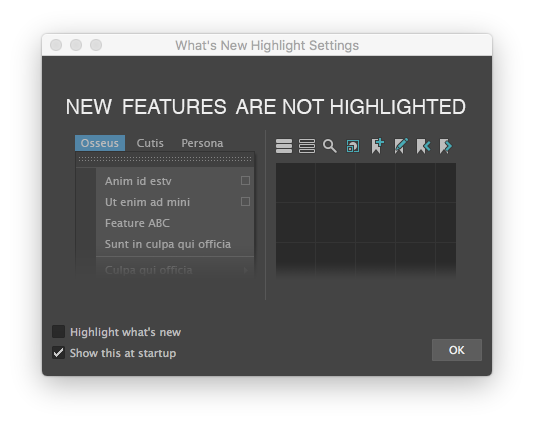
Setting showHighlightNewFeaturesWindowOnStartup to 0 removes the popup entirely.
There are a few things I found out while experimenting with this file:
– This isn’t in a standard XML file format and is in a non-standard location, and so a configuration profile can’t be used.
– It doesn’t work if you make any changes to the structure of the file. It needs all 1,848 lines, otherwise it breaks
Putting personal feelings about the file format, location and other oddities about the file aside, I opted to put the full code into the file at first login, including the two keys and values that I wanted:
#!/bin/sh

mkdir -p /Users/$USER/Library/Preferences/Autodesk/maya/2018/prefs

cat << 'EOF' > "/Users/$USER/Library/Preferences/Autodesk/maya/2018/prefs/userPrefs.mel"
//Maya Preference 2018 (Release 1)
//
//
keyTangent -global -inTangentType auto -outTangentType auto -weightedTangents false;
animDisplay -refAnimCurvesEditable false;
constructionHistory -tgl on;

optionVar -version 3;
optionVar
-iv "AEpopupWhenCreatingShaders" 1
-iv "CB_IgnoreConfirmDelete" 0
-iv "ChannelBox_ClearSelectionOnObjectSelectionChange" 0
-sv "CreateNurbsCircleCtx" "createNurbsCircleCtx...
... lots of code lines ...
-iv "displayNewFeatureHighlights" 0
... more code ...
-iv "showHighlightNewFeaturesWindowOnStartup" 0
... more code ...
ikSystem -e -sn true -ar false ;

EOF
Summary
I hope this helps someone out. If you need some help deploying Autodesk Maya 2018 with Jamf Pro, or want to get in touch about our UK Jamf Support and Jamf Consultancy services, email us at hello@moof-it.co.uk.
A complete copy of the post-install script can be found here: https://github.com/moofit/public_scripts/blob/master/Autodesk_Installer_Scripts/Autodesk_Maya_2018/scripts/install_and_activate_maya_2018.sh
A complete copy of the first run suppression script script can be found here: https://github.com/moofit/public_scripts/blob/master/Autodesk_Installer_Scripts/Autodesk_Maya_2018/scripts/setup_maya_2018.sh
Don’t forget, if you’re deploying Autodesk Maya 2018 with Jamf Pro, replace $USER with $3 on any login scripts.